New season, new headboard - once the fall rolls around (usually towards the end of September) I put away the summer bedding and bring out the winter stock. I was so thrilled with the slipcovered headboard I'd sewn for the summer bedding I decided I needed something equally as spectacular for winter.
Sequins came to mind - they would be blingy and kind of "me"!
Because I've been so busy sewing for my nieces wedding and had to alter another gown for another I didn't have time to get the bling I wanted as quickly as I wanted so I got up Sunday morning and set out to purchase just the "right thing".
And it's almost Halloween - am I crazy to be in my favourite fabric store the Sunday before Halloween . . . maybe not . . . every table had a cutter on it so I was in luck . . . more than once . . .
I looked at the bling, oh yes I did, but couldn't find anything that was the colour I wanted, a raspberry red, so ventured into the "special events" fabric area. It was like OMG THERE IT IS . . . a gorgeous rosette covered raspberry red fabric - just PERFECT . . . to the cutting table I go.
She cuts the fabric, and dammit I need lining . . . so I purchase the same amount of lining (.7M) and I don't know what made me do it . . . but I threw the lining on the table and then threw the rosette fabric over it and it was cut SO crooked I went back to the first cutter and asked her to cut it again . . . and she screws it up AGAIN . . . she gives me enough though (.8M) so I can at least have "enough". . . and I purchase 4M of blanket trim (and it matches perfectly might I add).
Easy sewing; straighten out the fabric; place the rosette over the lining (which is three inches shorter so the rosettes wrap around the back) and sew three loops on the top (one in the centre and one on either side).
Here is the finished product.
TOTAL COST: $28.00
TOTAL TIME: Less than 1 hour
Monday, 28 October 2013
Sunday, 20 October 2013
Burlap and Lace Wedding
| The bride setting up! |
| Burlap flowers; wax and wicks |
| Large and tiny roses with baby's breath |
| Burlap flower, some deconstructed petals and a lace hankie |
| Table shot (before any glassware was placed) |
| Everyone received two Truffles in a box and the name cards had tiny birds on the top right hand corner |
| One of my favourite shots! |
More Wedding Stuff . . . Table Numbers, a Thank You and Table Runners
I was not in charge of doing anything other than the table runners but I got crafty after I saw how my niece had made the "drink tickets" and made the table numbers for the tables and a "THANK YOU" sign for pictures. The theme of the wedding is burlap, lace and vintage.
Here are the table numbers - super simple - I had the scrap booking paper and stickers for the letters. I cut them to a reasonable size, affixed the letters and doillies to the corners, wrapped six wine corks with twine (leaving the one in the centre moveable so I could cut a slit into it for the sign).
For the "THANK YOU" sign I used another piece of paper and took the same steps as the table numbers - didn't get a picture of that though!
TOTAL TIME: About 1 hour total
TOTAL COST: ZERO - I had it all
Here are the table numbers - super simple - I had the scrap booking paper and stickers for the letters. I cut them to a reasonable size, affixed the letters and doillies to the corners, wrapped six wine corks with twine (leaving the one in the centre moveable so I could cut a slit into it for the sign).
| Copied from the Drink Tickets |
| Drink Tickets made by my niece |
For the "THANK YOU" sign I used another piece of paper and took the same steps as the table numbers - didn't get a picture of that though!
TOTAL TIME: About 1 hour total
TOTAL COST: ZERO - I had it all
Monday, 30 September 2013
Shoes, Shoes and more Shoes
OK, so I have a lot of shoes. Hate me if you want but it's really a passion. The ones that sit by the back door are usually the ones I wear all the time. But . . . I have them in every room of the house (well just about every room); I have them at the back door, the stair landing, a closet in my office is dedicated to them, a few in the basement closet and a couple of boxes of boots and cast offs in the dungeon part of the basement. Sad but true, I love them all and really can't part with many . . . so I hoard . . . well maybe not hoard but close . . . alright . . . after 8 years of a PILE of shoes at the back door and having heard enough from all of those who enter I finally bit the bullet and fixed the problem.
Here's the before.
Some of the shoes in the original picture have gone to winter storage but what's in the shoe storage now is about all I'll be wearing (ok, so I might have to rotate some if I purchase more which I'm trying not to do) but for now it's boots and runners.
TOTAL COST: $82.00
TOTAL TIME: 2 (and 1/2) hours
Here's the before.
| Before |
While I hate self assembly, sometimes the price to do so is a bit more cost efficient; and because I am a "weekend flyer" reader I saw something at JYSK that I thought I would go and have a look at. Once there I "liked" it but didn't LOVE it and was going to settle on something I wasn't 100% happy with when I turned around to start to leave with the "wrong" one and I found this! IT WAS PERFECT . . . and I can paint it . . .
Once home, I open up the box and stack the items to ensure I have everything and get down on my hands and knees on the kitchen floor and start assembling. After 10 minutes I am swearing like a trooper and have been up and down the stairs more than once because it just doesn't "fit" right . . . well perhaps I should have used the proper screws in the proper place and it would have gone faster . . . I have to break for dinner . . . which really means I have to rest because I am sweating so bad . . . and a 1/2 hour later, I'm back at it . . . two hours later and it's done. I think it looks fantastic but I AM going to paint it because I can never leave things as they are!| Product Package |
| I added a handle - this one was from my original garage door (the door is now the top of my work bench in my new garage) |
| And a bit of bling |
| And it's organized |
TOTAL COST: $82.00
TOTAL TIME: 2 (and 1/2) hours
Sunday, 29 September 2013
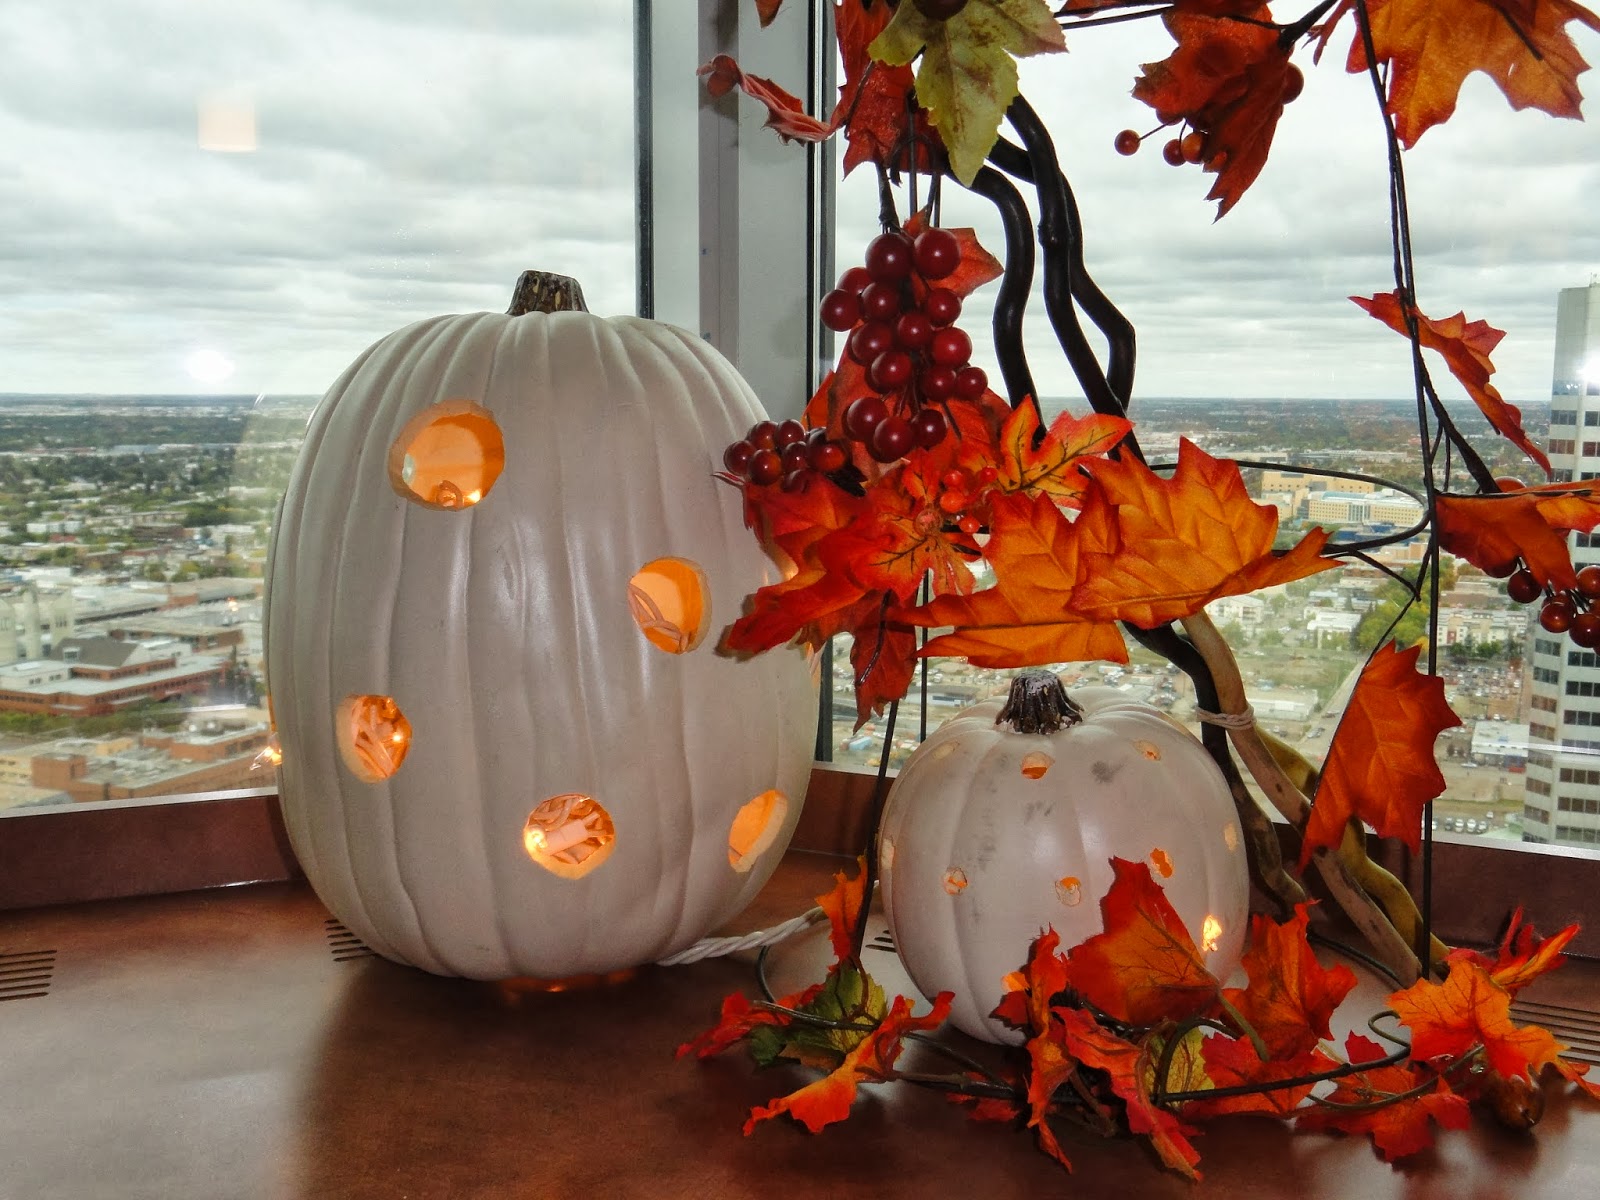
Fall Decore
I love the fall . . . really I do . . . it's my favourite time of year and I look forward to all the beautiful colours and cool crisp air.
I had the privilege and great honour this week to help out for a fall craft at work. My good friend Lorie is the guru in our office for doing our "Last Friday of the Month" every month (except during the summer when it is put on hold due to holidays/vacations) and she always has a theme. This month was (obviously) Fall.
She had seen an interesting post on Pinterest and she decided to roll with it and asked if I would like to help . . . are you kidding of course I did . . . I'll drop anything when crafts and creativity is involved.
She brought in four used tomato cages and purchased $15.00 worth of leaves and bobbles at the Dollar Store. I brought in the pumpkins and indoor mini lights and we went to work.
There was no "plan" per se; we just used what we had and went for it.
We inverted the cages and wired the tops with craft wire. Then we placed the lights on the cages and started creating.
Here are a few pics of the "work in progress" and the finished ones. The pictures do not do them justice - I either need a new camera or lessons on how to use the one I have!
TOTAL COST: $15.00 (wine extra)
TOTAL TIME: 1 lunch hour!
I had the privilege and great honour this week to help out for a fall craft at work. My good friend Lorie is the guru in our office for doing our "Last Friday of the Month" every month (except during the summer when it is put on hold due to holidays/vacations) and she always has a theme. This month was (obviously) Fall.
She had seen an interesting post on Pinterest and she decided to roll with it and asked if I would like to help . . . are you kidding of course I did . . . I'll drop anything when crafts and creativity is involved.
She brought in four used tomato cages and purchased $15.00 worth of leaves and bobbles at the Dollar Store. I brought in the pumpkins and indoor mini lights and we went to work.
There was no "plan" per se; we just used what we had and went for it.
We inverted the cages and wired the tops with craft wire. Then we placed the lights on the cages and started creating.
Here are a few pics of the "work in progress" and the finished ones. The pictures do not do them justice - I either need a new camera or lessons on how to use the one I have!
TOTAL TIME: 1 lunch hour!
Thursday, 26 September 2013
Acrylic Art Painting Class
More about the Radium Girls'Weekend . . .
Saturday was my sister's turn to teach us how to paint on canvass with Acrylic paint. As I mentioned in a previous blog my sister was in charge of this one . . . she is an amazing painter and artist and I learnt so much from her . . . which how makes her an outstanding teacher - I feel if I can do anyone can . . . I tried painting about 14 years ago and hated it but this was a totally different experience. I was amongst friends (and not that I wasn't the last time - this was just "different, I loved what I did this time)!!!!
Step 1 - decide on a canvass size . . . she chose a 16" X 20" canvass
Step 2 - choose the subject matter (Corn flowers)
Step 3 - graph out the chosen subject matter on a piece of 16" X 20" paper and photocopy for everyone (she made four)

Step 4 - Paint the canvass with your background colour

Step 5 - before the background colour is dry sprinkle salt on the canvass
Step 6 - once Step 5 is dry wipe the salt away
Step 7 - take the subject matter and place a piece of carbon paper in between that and the canvass
Step 8 - trace the subject matter on the canvass (being very careful not to rub your hand on the paper so that it transfers to the canvass)
Step 9 - look at the black and white version of the subject matter to see "value" (dark and light)
Step 10 - start painting the stems and flowers with the darkest "value" first
Step 11- continue on with the lightest "value" of stems and flowers
Step 12 - move on to the centres of the flowers the same way (we painted all of ours the same colour)
Step 13 - keep adding light and dark as you see fit . . . here are the finished products
TOTAL COST: $15.00/person for the canvasses and brushes (cheap ones) - we all drank our own wine!
TOTAL TIME: 4 hours and some
The experience was priceless - I was totally amazed at how they all turned out - would I do it again . . . maybe! ! ! ! !
Step 1 - decide on a canvass size . . . she chose a 16" X 20" canvass
Step 2 - choose the subject matter (Corn flowers)
Step 3 - graph out the chosen subject matter on a piece of 16" X 20" paper and photocopy for everyone (she made four)
Step 4 - Paint the canvass with your background colour
Step 6 - once Step 5 is dry wipe the salt away
Step 7 - take the subject matter and place a piece of carbon paper in between that and the canvass
Step 8 - trace the subject matter on the canvass (being very careful not to rub your hand on the paper so that it transfers to the canvass)
Step 9 - look at the black and white version of the subject matter to see "value" (dark and light)
Step 10 - start painting the stems and flowers with the darkest "value" first
Step 11- continue on with the lightest "value" of stems and flowers
Step 12 - move on to the centres of the flowers the same way (we painted all of ours the same colour)
Step 13 - keep adding light and dark as you see fit . . . here are the finished products
TOTAL COST: $15.00/person for the canvasses and brushes (cheap ones) - we all drank our own wine!
TOTAL TIME: 4 hours and some
The experience was priceless - I was totally amazed at how they all turned out - would I do it again . . . maybe! ! ! ! !
Subscribe to:
Posts (Atom)