The gift giving has ended and the gift card spending has begun. In spite of the fact I received some fantastic cards, it seems I am always looking for the impossible - well it "seems" that way. It also seems I am always working on a "project" (or something if you want to call it a project or not).
 |
| Before |
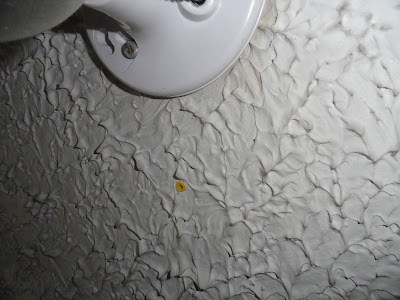
One card I received this year was to a place I LOVE +Wellington Gardens and purchased a couple of things but one "something" I specifically went in there to look for was a hanging basket. You might think it's a bit early for that isn't it (given the fact our Canadian winters won't allow us to really start gardening for another four months) . . . well not for me it wasn't.
Because I was not interested in hiring an electrician (particularly due to the room only being used for guest/storage purposes and the because budget is almost always limited) I decided to go the route of creativity rather than the route of spending a lot of cashola. Hence the hanging basket.
I had the notion that if I could take a basket (preferably with some kind of hole in it or one that I could make a hole or opening in it) that would work. You see I dream and fantasize about what I would do with the basket before I even buy it and then hope it comes to fruition (remember the looking for impossible statement).
So, as I was shopping at Wellington Gardens (outside in the shed in -25 C weather) a sales clerk approached me and asked was I "finding what I was looking for" and we got into a conversation about me always looking for the impossible - I'd found a basket but it was WAY to heavy for my purposes and how I had dreamed it would all come together so she suggested one that was wrapped with twigs (you've seen them) that I could deconstruct and just use the frame - I settled for that one and walked into another part of the outside area to see if they had their famous mulled wine - and they did . . . I love shopping when wine is involved . . . and she chased me out of the shed and said . . . hey wait . . . I think I found something! and she HAD! I was excited . . . and there it was - PERFECT!
So with the use of these some other previously purchased hooks, a pair of wire cutters/pliers, an electric drill (ya had to drill the holes because I'm weak in the wrists) and some plugs I found in the very messy work bench (another project coming up) I proceeded with my first project of the year!
 |
| Remove the coco liner |
 |
| and chains |
 |
| Then measure to evenly space the three holes around the centre of the light fixture and plug the holes with the plastic wall plugs (to fit the screws on the hooks). |
 |
| Screw in the hooks. |
 |
Remove the chains and reclip the hooks to the opposite side (bottom) of the basket and secure them to the hooks |
I may in the future hang crystals from the bottom or even wrap raw twine in and out to completely cover the shade (or rip fabric in strips and wind it around) but for the time being this is exactly what I had envisioned.
Total cost of project (for me): ZERO
Total cost for you: $10 to 50/basket; $5.00 for hooks and plugs
Total time spent: ONE HOUR
Well worth it after seven years of dreaming what I could do with that open light fixture.
 |
| After - VOILA! |


Love it so cute
ReplyDeleteLove it! Intuitive, innovative and inexpensive. All in, fabulous idea. You are so creative! Can't wait for the next project.
ReplyDeleteYou are indeed creative Lynnie!! Awesome blog!! Looking forward to reading more about your fabulous ideas :)- Tan
ReplyDelete